Are you new to dabbing scene? Confused or concerned on the promise of a more potent and fulfilling experience? If you are seeking to further your knowledge on vaporizers or other such devices, then we suggest taking a look at our Concentrate Vapes article for more information before continuing reading.
Concentrate usage has seen a dramatic increase in the past few years, all in thanks to new E-rigs coming out seemingly every few months. With new and frequent additions to an ever growing market it can be hard to choose which best suits your desired experience when dabbing. You may see big name brands like Puffco as a prime example of a well-known and respected name in the industry as devices tailored for everyone.
Many users find using a traditional torch and banger set up to be time consuming, or even just inefficient. To get the best use out of your product, would you not want to have a device that increase the consumption, decreases waste, and provides a cleaner hit? It's no wonder users are making the switch to E-rigs from the traditional form. The longevity of the devices and the practicality brings new and innovative ways to smoke.
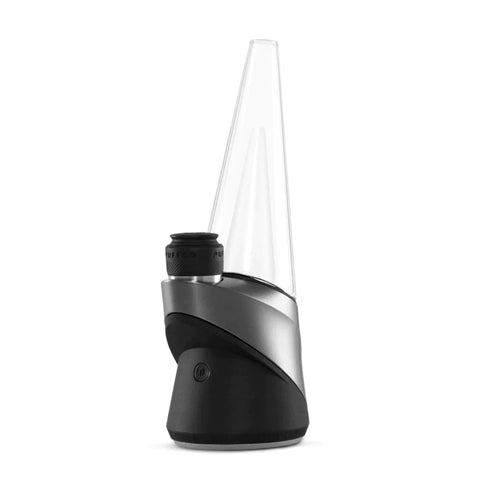
The Puffco Peak Pro is an excellent device for beginners and experienced individuals alike, due to its simplicity in use as well as maintenance. Puffco has always been a brand surrounded in dependability and effectiveness due to the time and energy put into each new device manufactured. So let's go over How to use a Puffco Peak Pro.

Upon opening the packaging you will find the Puffco Peak Pro device itself, along with; five hybrid q-tip scraping tools, the Puffco dab tool, Type-C charger, and carb cap with tether.
The device comes put together with the exception of the carb cap tether being set aside. After taking it out of the box the actual use is super simple!
1. Fill the glass attachment to the waterline as depicted on glass
2. Align the inlet hole with the chamber
3. Unlock/Lock device by pressing and holding the button (located under the camber) for 3 seconds
4. Toggle through the heat settings with just one click
Blue (low) 490°F
Green (medium) 510°F
Red (high) 530°F
5. Use the loading tool to add your product.
If you are using the tethered carb cap simply place the cap back on after loading the product.
6. Double tap the button to start the Heat-up
6. Double tap the button to start the Heat-up
The device will flash three times and buzz when ready to inhale.
To exit the heat-up mode simply press and hold the button down until the device turns off.
To exit the heat-up mode simply press and hold the button down until the device turns off.
After all that is done, you're ready to enjoy your device! Play with the settings to figure out what your ideal experience will be with this device. To give the consumer a more efficient and enjoyable experience is the goal of this device. Finally you can take more satisfying hits off of a reliable device outfitted to suit the needs of the many users looking for such a device.